
Webhooks Overview
Webhooks are user-defined HTTP callbacks that are triggered when an order or shipment create/update event occurs. Whenever an event occurs, the webhook sees the event, collects the event data, and sends it to the Call Back URL specified by you in the form of an HTTP request.
This is important as it allows you to get the latest information about your order or shipment when an event in our system occurs so that you can pass it back into your system.
Getting Started with Webhooks
To get started with Webhooks, you’ll need to have (or build) a webhook handler to receive the webhook requests from our system. The webhook handler will need to accept the requests and perform the action with the contents in the request.
To sign up for Webhooks, you’ll need to subscribe to an event of your choosing and provide the address of your webhook handler for each event you wish to subscribe to. An example of a webhook handler address is:
https://webhook.site/a5a6d378-3e6b-4ca2-a1ae-4c32dc168504
Webhook Format
Webhook can contain one or multiple events depending on your system's needs. It will always consist of limited event payload information that you can then use to retrieve additional information about that event. To version events, maintain security, and limit payload size, the event payload does not return the object itself, such as an order or shipment definition - just the IDs.
For instance, when you receive a Webhook for an order-update event you can use the order ID in that payload to then make a GET request to the Order API and retrieve the full order data.
Webhook Fields
Webhook objects may contain the following basic information to describe events. Depending on the event type, the Webhook payload may also contain an Order ID, your internal Order ID, or a shipment ID, and responseDescription may vary or provide additional details about an event.
RequestId- An identifier used to track API requests across different services.EventType- The type of event that occurred, such asorder-creationororder-update.MetaData- This is a list of key:value string pairs which varies depending on what information is being provided.SubscriberId- This is a unique identifier of the entity the order belongs to.Description- Contains the message that describes the event. For example, if the order was created successfully or failed to be created.ResponseCode-200for success,4xxor5xxin case of failure
Webhook Topics
Webhooks are organized by topics, which are buckets of one or more notifications associated with a particular event/object such as orders or shipments. The table below lists some of the most common notifications and identifies the events that trigger them.
Event Category
Event Type
Description
Order
order-creation
Order created and processed successfully.
Order
order-creation
Order failed to be created.
Order
order-update
One or more properties of a defined order were updated.
Shipment
shipment-created
Shipment created sucessfully.
Shipment
shipment-update
One or more properties of a shipment were updated.
Webhook Configuration
To configure your Webhooks, once you’re logged in, go to the Admin Settings section of the left side Admin panel and click on Webhooks. From there, you can subscribe to an event by creating your first Webhook.
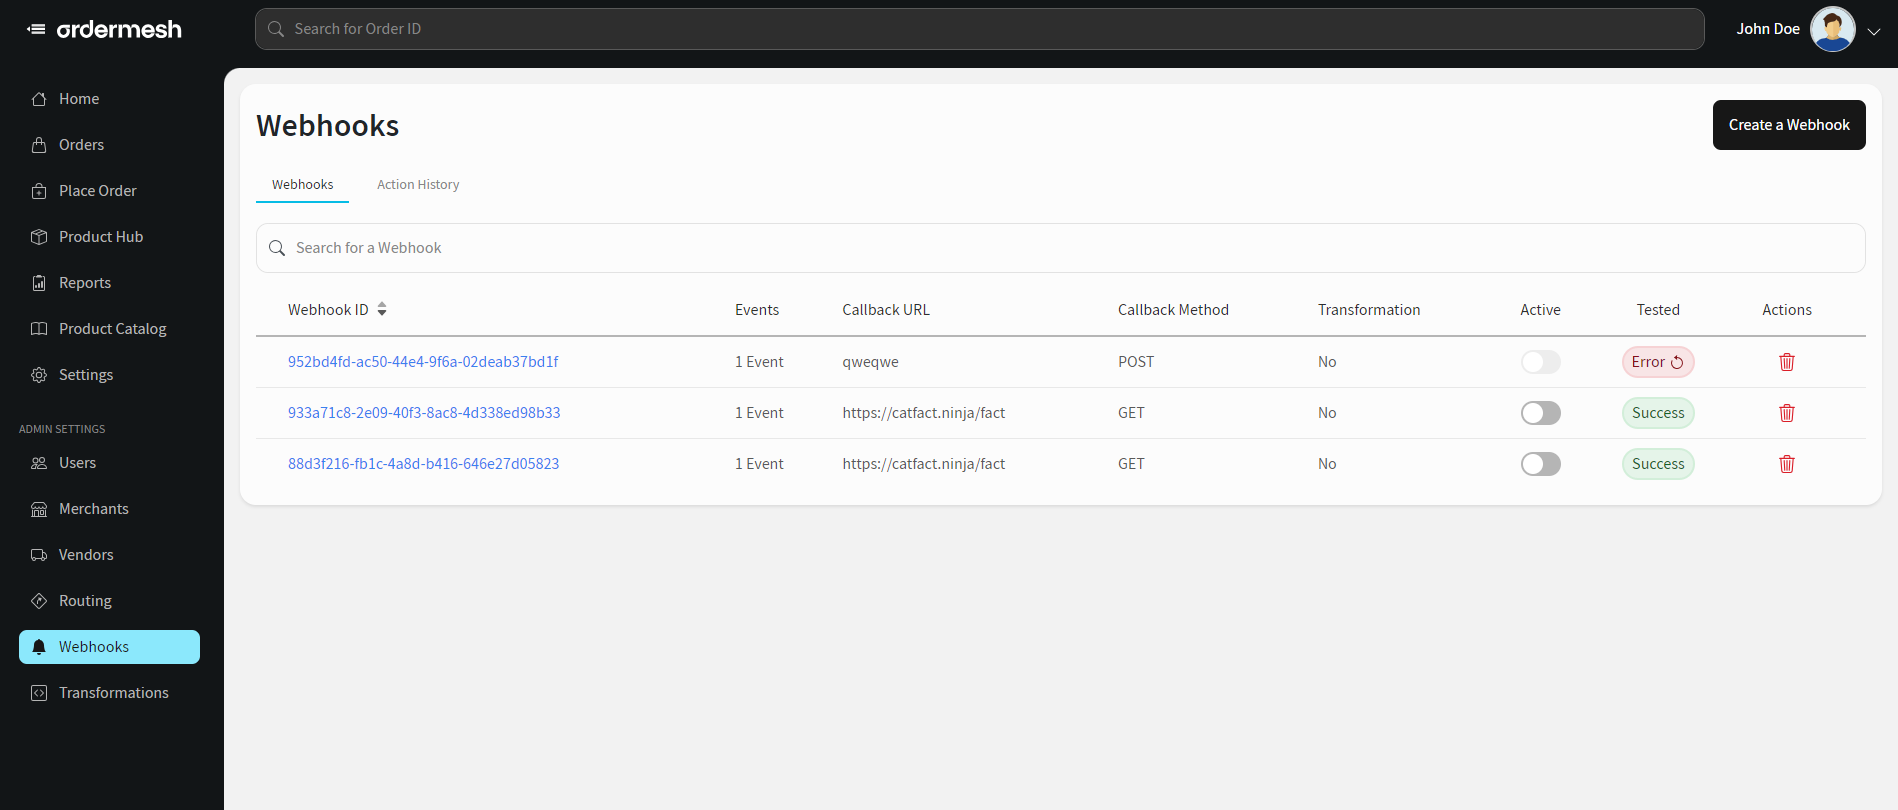
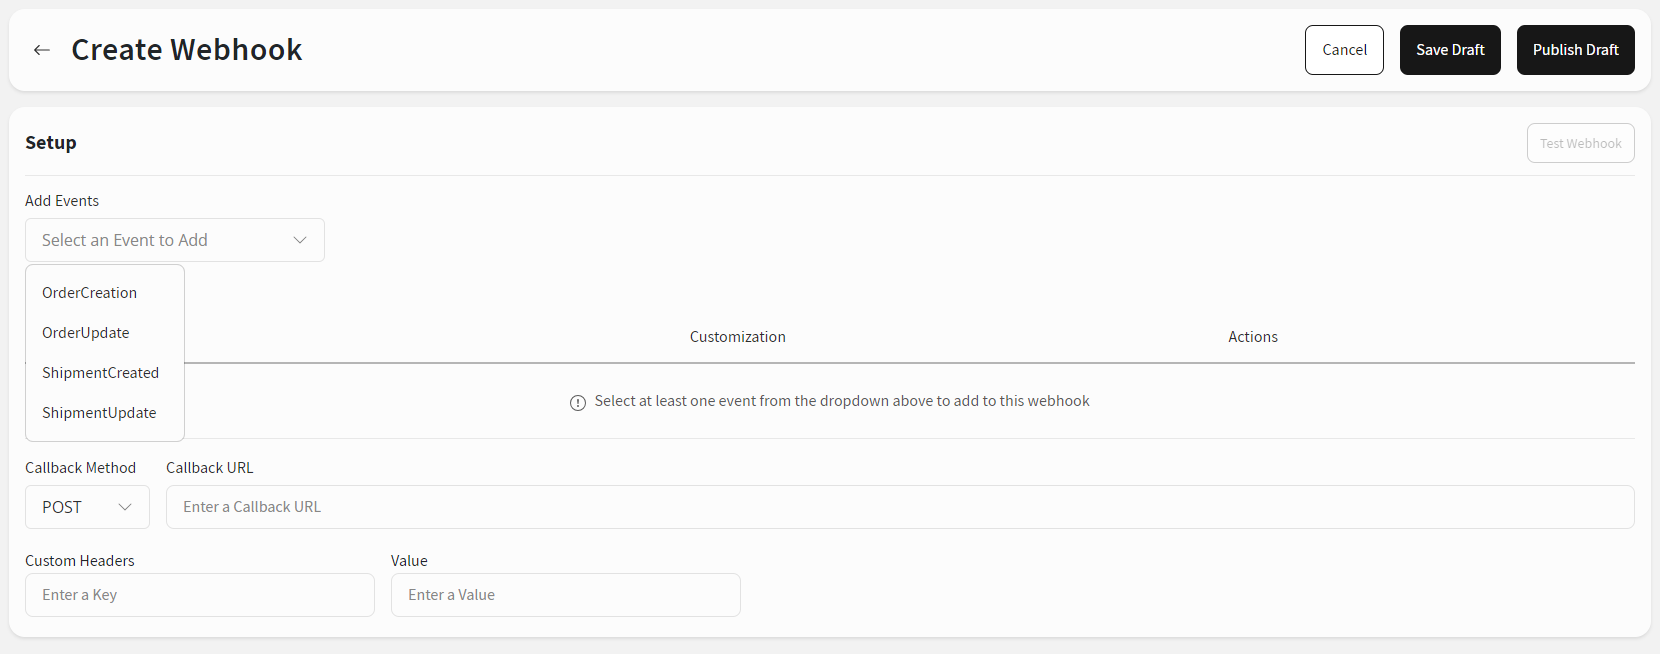
Once you click on the Create a Webhook button, you’ll land on a page that provides you with the following fields that need to be configured:
Events - allows you to Select an Event you wish to subscribe to by choosing a specific event from a drop-down list of events:
OrderCreation,
OrderUpdate,
ShipmentCreated, or
ShipmentUpdate.
Callback Method - allows you to choose a method for sending a Webhook
Callback URL - allows you to enter the address of your Webhook handler
Custom Headers - allows you to add any custom headers you need / you can use this for authenticating against your Webhook handler
Please note that, you can add multiple events to a single Webhook by adding them from the events drop-down list. From there you can hit Publish or Save Draft to continue later.
Webhook Customization
You also have the option to customize the Webhook payload values on individual events within a webhook subscription.. First you need to configure and publish a webhook.
Go to Webhooks → Webhook ID
Click on Edit → Create Customization (each event will have this option)
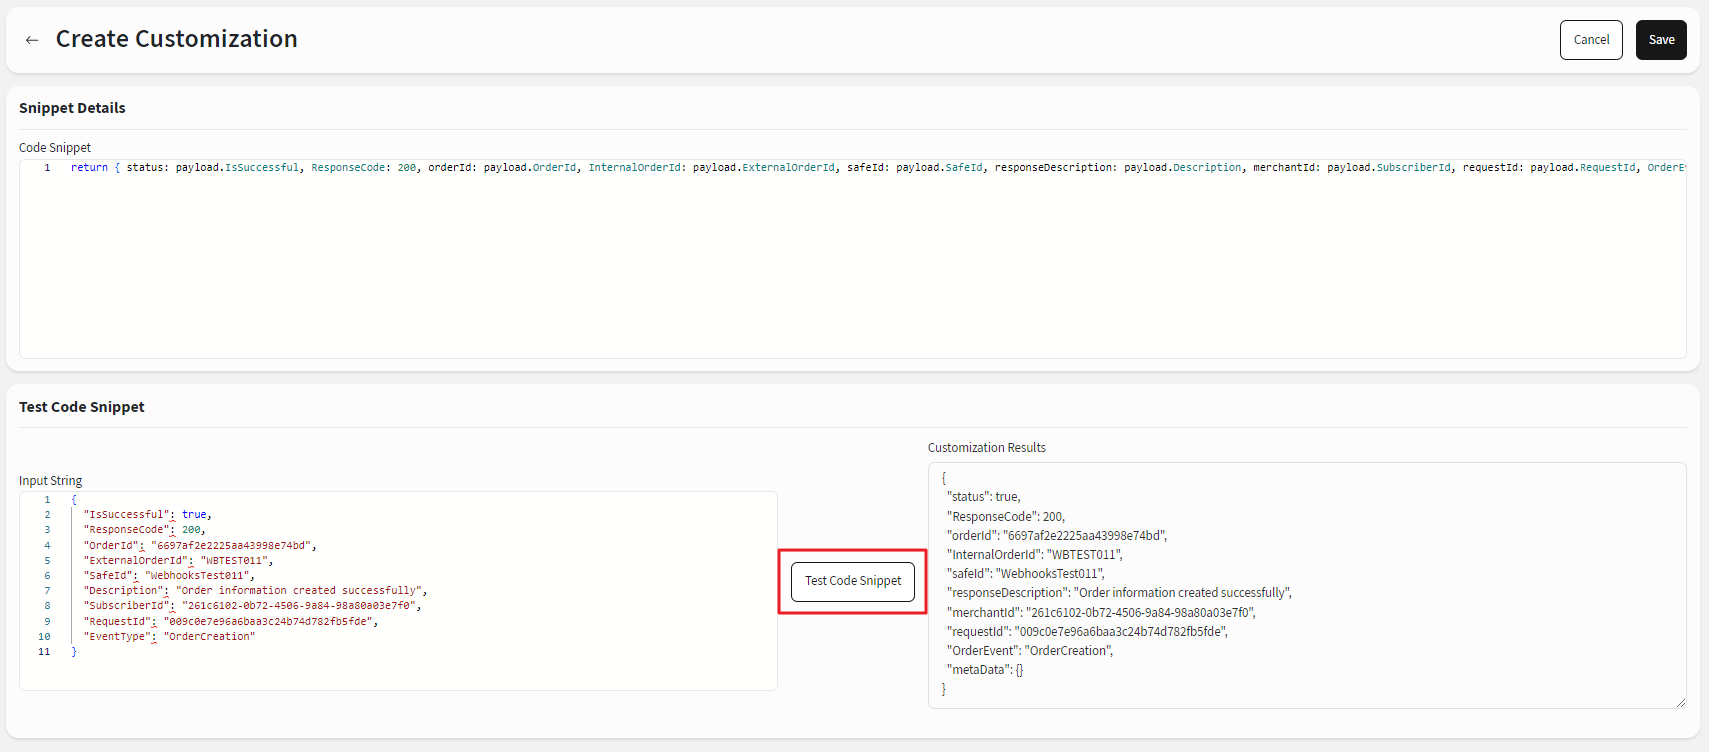
Customize the payload by building a transformation snippet. You'll need a couple of things:
Input String - The original Webhook payload that our system is sending for a specific event
Code Snippet - A transformation code snippet that will tell our system how to transform the payload
Test your transformation.
Save the customization.
Publish the Webhook to make the Customization live.
Let's see an example below where we transformed externalOrderId to InternalOrderId and EventType to OrderEvent:
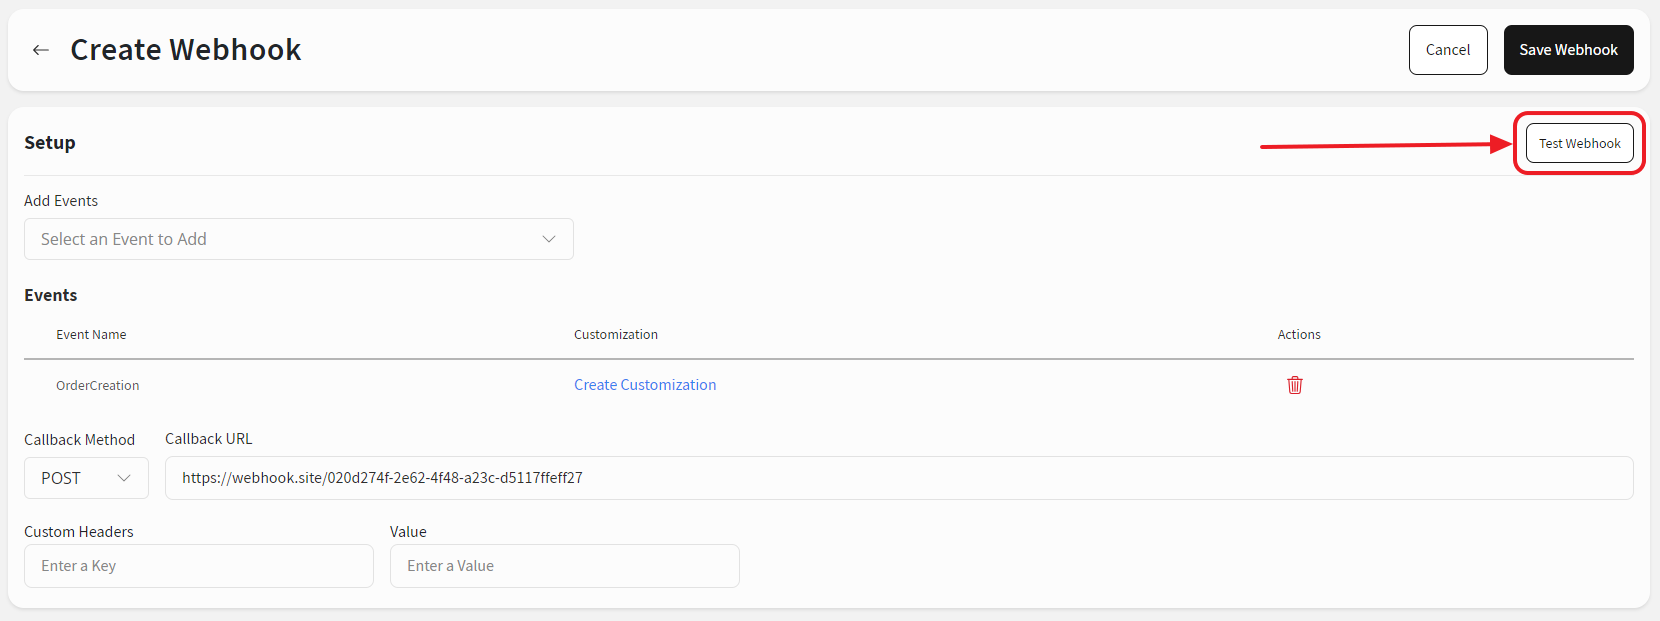
Test Webhooks
You can test your Webhook subscriptions, by triggering the Test button on the Create Webhook page or by triggering the Test Webhook button before hitting the Publish Draft.
Please note that you can only Publish a Webhook once it successfully passes the test.
Continue to Merchant User Quick Start Guide OR Vendor User Quick Start Guide